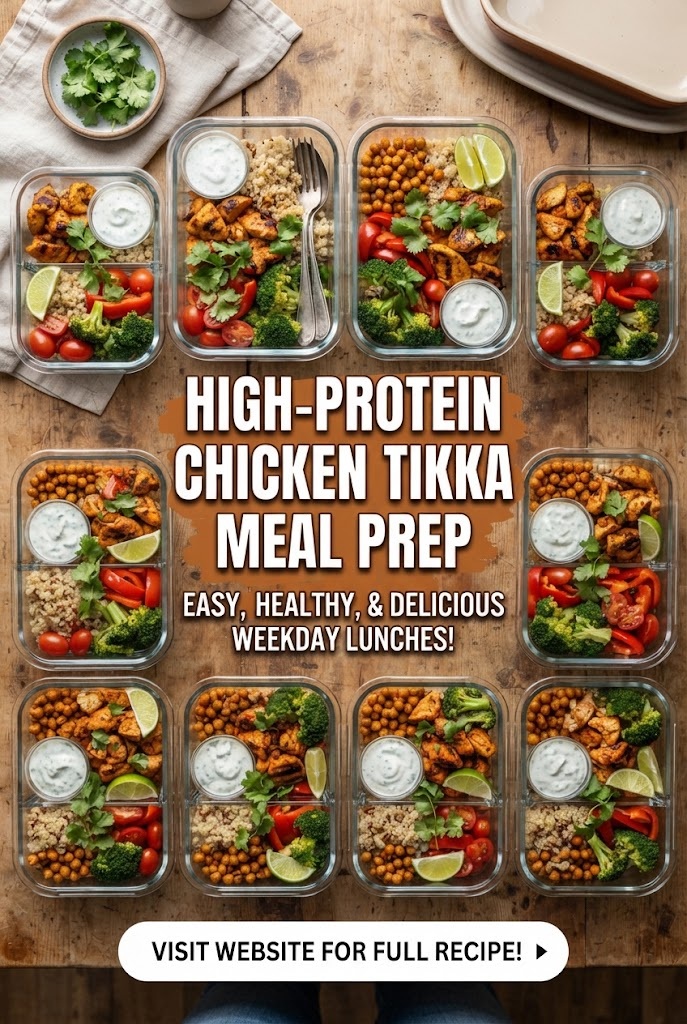
For many fitness enthusiasts and busy professionals, the struggle to find a dinner that is both nutritionally optimal and flavorfully satisfying is a daily challenge. We often find ourselves trapped in the cycle of “chicken and broccoli”—a bland, repetitive routine that leads to palate fatigue and eventually, the abandonment of healthy eating habits.
However, there is a culinary secret that has existed for centuries, hailing from the vibrant streets of the Indian subcontinent: the Tikka flavor profile. By combining high-protein lean meats with the robust, aromatic spices of a traditional Tikka marinade, you can transform your meal prep from a chore into a gourmet experience.
In this comprehensive guide, we will explore the science of the Tikka marinade, the nutritional benefits of high-protein chicken meal prepping, and five distinct, delicious recipes designed to keep your muscles fueled and your taste buds excited.
The Anatomy of the Tikka Marinade: Why It Works
Before diving into the recipes, it is essential to understand why Tikka is the perfect partner for meal prep. A traditional Tikka marinade serves two purposes: tenderization and flavor infusion.
1. The Acidic Component
Tikka typically utilizes yogurt (curd) as its base. Unlike vinegar or citrus, which can make meat rubbery if left too long, the lactic acid in yogurt breaks down the muscle fibers of the chicken gently. This is crucial for meal prep because as the chicken sits in the fridge and is later reheated, the yogurt-tenderized fibers retain their moisture.
2. The Spice Profile
- Turmeric: Known for its anti-inflammatory properties (curcumin), it provides a vibrant golden hue.
- Cumin and Coriander: These provide the earthy, nutty backbone of the flavor.
- Kashmiri Red Chili: This offers a deep red color and a mild heat that doesn’t overwhelm.
- Garam Masala: A complex blend of warming spices like cinnamon, cardamom, and cloves.
- Ginger and Garlic: The “holy trinity” of aromatics that provide depth and antimicrobial benefits.
3. High Protein Efficiency
Chicken breast is the gold standard for high-protein dieting, offering roughly 31 grams of protein per 100 grams. By using Greek yogurt in the marinade instead of heavy cream or oil, we further boost the protein content while keeping the calorie count low.
Recipe 1: The Foundation — Classic High-Protein Grilled Chicken Tikka
This is your versatile “base” recipe. These skewers are perfect for eating on their own, tossing into a salad, or serving with a side of grains.
Ingredient Details
| Ingredient | Category | Quantity (for 4 servings) | Macro Benefit |
|---|---|---|---|
| Chicken Breast | Protein | 1kg (2.2 lbs) | High lean protein, low fat |
| Non-Fat Greek Yogurt | Marinade Base | 1 Cup | Probiotics & extra protein |
| Lemon Juice | Acid | 2 tbsp | Tenderizer & Vitamin C |
| Ginger-Garlic Paste | Aromatics | 2 tbsp | Digestive aid |
| Kashmiri Red Chili Powder | Spice | 1.5 tbsp | Metabolism boost |
| Garam Masala | Spice | 1 tbsp | Complex flavor profile |
| Ground Cumin | Spice | 1 tsp | Earthy depth |
| Turmeric Powder | Spice | ½ tsp | Anti-inflammatory |
| Salt | Seasoning | To taste | Essential electrolytes |
| Avocado Oil | Fat | 1 tbsp | High smoke point healthy fat |
Step-by-Step Instructions
- Preparation of the Protein: Start by cleaning the chicken breasts and patting them dry with paper towels. Excess moisture on the surface prevents the marinade from sticking. Cut the chicken into uniform 1.5-inch cubes to ensure even cooking.
- The Marinade Slurry: In a large glass bowl, whisk the Greek yogurt until smooth. Add the lemon juice, ginger-garlic paste, and all the dry spices. Stir until you have a thick, vibrant orange-red paste.
- The Coating Process: Add the chicken cubes to the bowl. Use your hands (wearing gloves if you don’t want stained fingers from the turmeric) to massage the marinade into every crevice of the meat.
- The Chilling Phase: Cover the bowl with plastic wrap and refrigerate for at least 4 hours. For the best results in meal prep, 12 to 24 hours is ideal, as this allows the enzymes in the yogurt to fully tenderize the meat.
- Skewering: If using wooden skewers, soak them in water for 30 minutes to prevent burning. Thread the chicken pieces onto the skewers, leaving a tiny bit of space between each piece to allow the heat to circulate.
- The Cooking Process:
- Grill: Pre-heat your grill to medium-high heat. Lightly brush with avocado oil. Grill for 12-15 minutes, turning occasionally, until the internal temperature reaches 165°F (74°C) and you see charred edges.
- Oven/Air Fryer: 400°F (200°C) for 15-18 minutes.
- Resting: Let the chicken rest for 5 minutes before packing into containers. This locks the juices inside.
Recipe 2: Tikka Masala Meal Prep Bowls with Cauliflower Rice (Low Carb)
For those looking to keep their carbohydrate intake low while maximizing volume, this bowl is a game-changer. We swap traditional heavy cream for a lighter, protein-rich sauce.
Ingredient Details
| Ingredient | Category | Quantity | Form Shape |
|---|---|---|---|
| Pre-cooked Tikka Chicken | Protein | 600g | Cubed/Grilled |
| Cauliflower Rice | Base | 4 Cups | Grated/Frozen |
| Canned Tomato Puree | Sauce Base | 1.5 Cups | Smooth liquid |
| Low-Fat Coconut Milk | Creaminess | ½ Cup | Liquid |
| Fresh Spinach | Fiber | 3 Cups | Raw leaves |
| Onion | Aromatic | 1 Large | Finely diced |
| Bell Peppers (Mix) | Veggie | 2 Units | Sliced strips |
| Fresh Cilantro | Garnish | ½ Bunch | Chopped |
Step-by-Step Instructions
- Sauté the Aromatics: In a large non-stick pan, sauté the diced onions until translucent. Add a splash of water if they start to stick to avoid using too much oil.
- The Base Sauce: Pour in the tomato puree. Add a teaspoon each of cumin, coriander, and garam masala. Let this simmer for 10 minutes until the sauce darkens and thickens.
- Creamy Transformation: Stir in the low-fat coconut milk. This provides the signature “Masala” texture without the calorie bomb of heavy cream.
- Integrate the Protein: Add your pre-grilled Tikka chicken cubes (from Recipe 1) into the sauce. Let them simmer for 5 minutes so they soak up the gravy. Fold in the fresh spinach at the very end until wilted.
- Prepare the “Rice”: In a separate pan, sauté the cauliflower rice with a pinch of turmeric and salt for 5-7 minutes. Do not overcook, or it will become mushy.
- Assembly: Divide the cauliflower rice into 4 meal prep containers. Top with the Chicken Tikka Masala mixture. Add a side of sliced bell peppers for crunch.
- Storage: These bowls last up to 4 days in the fridge. The sauce keeps the chicken incredibly moist during microwave reheating.
Recipe 3: High-Protein Tikka Pasta (The Fusion Feast)
Who says you can’t have pasta on a fitness diet? By using chickpea or lentil-based pasta, we skyrocket the protein and fiber content of this Tikka-flavored dish.
Ingredient Details
| Ingredient | Category | Quantity | Nutrition Note |
|---|---|---|---|
| Chickpea Pasta (Penne) | Carbohydrate | 250g (Dry) | High fiber, high protein |
| Chicken Breast | Protein | 500g | Lean tissue builder |
| Tikka Spice Blend | Flavor | 3 tbsp | Cumin, turmeric, chili |
| Skim Milk | Sauce | 1 Cup | Low calorie calcium |
| Cornstarch | Thickener | 1 tsp | For sauce consistency |
| Nutritional Yeast | Flavor | 2 tbsp | Cheesy flavor & B-vitamins |
| Peas | Veggie | 1 Cup | Plant protein boost |
Step-by-Step Instructions
- Pasta Prep: Boil the chickpea pasta in salted water. Drain it 2 minutes before the “Al Dente” stage. Since it will be reheated during meal prep, you want it slightly undercooked.
- Tikka Chicken Strips: Slice the chicken breast into thin strips. Toss them in the Tikka spice blend. Sear them in a hot pan until fully cooked and slightly browned. Set aside.
- The Protein White Sauce: In the same pan, whisk together skim milk, cornstarch, and nutritional yeast. Heat over medium until the sauce begins to bubble and thicken. This creates a “besciamella” style sauce with an Indian twist.
- The Merger: Add the Tikka chicken, cooked pasta, and green peas into the sauce. Stir gently to coat every strand or tube of pasta.
- Garnish: Top with cracked black pepper and a squeeze of lime to brighten the flavors.
- Portioning: Divide into 3-4 containers. When reheating, add a teaspoon of water to loosen the sauce.
Recipe 4: Tikka-Spiced Chicken & Quinoa Power Salad
For those who prefer a cold or room-temperature lunch, this power salad combines the complexity of Tikka spices with the superfood benefits of quinoa.
Ingredient Details
| Ingredient | Category | Quantity | Form Shape |
|---|---|---|---|
| Quinoa | Grain | 1.5 Cups (Cooked) | Fluffy grains |
| Tikka Marinated Chicken | Protein | 400g | Small cubes |
| Cucumber | Veggie | 1 Large | Diced |
| Cherry Tomatoes | Veggie | 1 Cup | Halved |
| Red Onion | Aromatic | ½ Unit | Thinly sliced |
| Chickpeas | Protein/Fiber | 1 Can | Rinsed |
| Mint-Yogurt Dressing | Sauce | ½ Cup | Liquid/Creamy |
Step-by-Step Instructions
- Grain Preparation: Cook the quinoa in chicken bone broth instead of water. This adds an extra 5-10 grams of protein to the entire batch and infuses the grain with flavor.
- Protein Component: Use the grilled Tikka chicken cubes. For a salad, it is best to cut them slightly smaller (half-inch cubes) so you get a bit of chicken in every forkful.
- The Crunch Factor: In a large mixing bowl, combine the cooled quinoa, chicken, diced cucumber, tomatoes, and red onion. Add the chickpeas for an extra layer of texture and plant-based protein.
- The Dressing: Mix ½ cup of non-fat Greek yogurt with chopped fresh mint, lemon juice, and a pinch of cumin. Keep this dressing in a separate small container to prevent the salad from getting soggy.
- Meal Prep Tip: This recipe is excellent for “Jar Salads.” Layer the dressing at the bottom, followed by the chicken, then chickpeas, then quinoa, and finally the fresh veggies on top.
Recipe 5: Slow Cooker Tikka Pulled Chicken (Bulk Prep)
If you have a very busy week ahead, the slow cooker is your best friend. This “dump and go” recipe creates a succulent pulled chicken that can be used in wraps, tacos, or over rice.
Ingredient Details
| Ingredient | Category | Quantity | Preparation |
|---|---|---|---|
| Chicken Thighs (Boneless) | Protein | 1.5kg | Fat-trimmed |
| Tomato Paste | Flavor Base | 4 tbsp | Concentrated |
| Tikka Spice Mix | Spices | 4 tbsp | Homemade or store-bought |
| Garlic Cloves | Aromatic | 6 Units | Smashed |
| Greek Yogurt | Finisher | ½ Cup | Added at the end |
| Honey or Stevia | Balance | 1 tsp | To cut acidity |
Step-by-Step Instructions
- The Base Layer: Place the trimmed chicken thighs at the bottom of the slow cooker. Thighs are preferred here because they hold up better to long cooking times without drying out.
- The Flavor Bomb: In a small bowl, mix the tomato paste, garlic, spices, and sweetener with half a cup of water. Pour this over the chicken.
- Slow and Steady: Cook on “Low” for 6-7 hours or “High” for 3-4 hours. The chicken should be tender enough to shred with two forks.
- Shredding: Once cooked, remove the chicken from the pot. Shred the meat into long strands.
- The Final Touch: Return the shredded chicken to the pot. Turn off the heat and stir in the Greek yogurt. This creates a creamy, rich coating that clings to the shredded meat.
- Usage: Use this throughout the week. Day 1: Tikka Tacos with whole wheat tortillas. Day 2: Over a bed of greens. Day 3: In a high-protein pita wrap.
Deep Dive: The Science of Meal Prepping Chicken
To make these recipes successful for a full week, you must understand the logistics of meal prepping.
Temperature Control and Safety
Chicken must be handled with care to avoid foodborne illnesses.
- The 2-Hour Rule: Never let your cooked Tikka chicken sit at room temperature for more than 2 hours.
- Rapid Cooling: To maintain the texture of the chicken, spread it out on a baking sheet to cool quickly before placing it in airtight containers. Putting hot food directly into the fridge can raise the internal temperature of the refrigerator, risking other foods.
Choosing the Right Containers
- Glass Containers: Ideal for the Tikka Masala and Pasta recipes. Glass does not retain the strong odors of garlic and cumin, and it is safer for microwave heating.
- BPA-Free Plastic: Good for the Quinoa Salad or cold snacks, as they are lightweight for commuting.
- Compartment Containers: Essential for Recipe 1 (Grilled Skewers) to keep the chicken away from any moist sides like a cucumber salad, preserving the “charred” texture.
Reheating for Maximum Flavor
The biggest complaint about meal-prepped chicken is that it becomes “rubbery.”
- The Microwave Trick: When reheating your Tikka bowls, place a damp paper towel over the top. This creates a steam-chamber effect that re-hydrates the chicken.
- The Air Fryer Refresh: For the grilled skewers, 3 minutes in an air fryer at 350°F will bring back the crisp edges that a microwave would soften.
Nutritional Breakdown: Why This Matters
When we talk about “High Protein,” we aren’t just looking at the total grams. we are looking at the Protein-to-Calorie Ratio.
A standard Chicken Tikka portion (using 200g of breast meat and Greek yogurt marinade) provides:
- Calories: ~320 kcal
- Protein: 62g
- Carbohydrates: 6g
- Fats: 4g
Compared to a restaurant Chicken Tikka Masala which can exceed 800 calories due to heavy cream and butter (ghee), these meal prep versions allow you to eat a massive volume of food while staying within a fat-loss or muscle-building caloric window.
The Micronutrient Bonus
By using Tikka spices, you aren’t just adding flavor; you are adding “functional” ingredients:
- Gingerols: From ginger, aiding in muscle soreness recovery.
- Capsaicin: From the chili, providing a minor thermogenic effect.
- Calcium: From the yogurt base, supporting bone health.
Advanced Flavor Tips for the Tikka Connoisseur
If you want to take your meal prep from “good” to “restaurant quality,” consider these professional techniques:
1. The Bloomed Spice Technique
Before adding your spices to the yogurt marinade, “bloom” them. Heat a tiny amount of avocado oil in a pan and toss the dry spices in for 30 seconds until fragrant. This releases the essential oils that are otherwise trapped in the dried powder. Let the oil cool before mixing it into the yogurt.
2. The Dhungar Method (Smoky Flavor)
To get that authentic “Tandoori” (clay oven) taste without an actual Tandoor, you can use the smoke method.
- Place a small metal bowl or a piece of aluminum foil in the center of your marinated chicken.
- Heat a piece of natural charcoal until red hot.
- Place the charcoal in the bowl, pour a teaspoon of ghee or oil over it so it starts smoking, and immediately cover the large bowl with a lid for 5-10 minutes. The meat will absorb a deep, authentic smoky aroma.
3. Double Marination
For the ultimate tenderness:
- First Marinade: Rub the chicken with salt, lemon juice, and red chili powder. Let it sit for 20 minutes. This opens up the pores of the meat.
- Second Marinade: Apply the yogurt and spice mixture. This ensures the flavor penetrates deep into the center of the chicken cubes.
Maximizing Your Prep: A Sample Weekly Schedule
To make this efficient, follow this “Power Hour” prep guide:
- Sunday 10:00 AM: Cut all chicken (2-3kg total). Prepare the large batch of Greek yogurt Tikka marinade.
- Sunday 10:30 AM: Divide chicken into two bowls. Bowl A for Grilling (Recipe 1). Bowl B for the Slow Cooker (Recipe 5).
- Sunday 4:00 PM: Start the Slow Cooker. Preheat the oven/grill for the skewers.
- Sunday 4:30 PM: While chicken is cooking, boil the quinoa and the chickpea pasta.
- Sunday 5:00 PM: Chop all fresh veggies (cucumbers, onions, peppers).
- Sunday 6:00 PM: Shred the slow cooker chicken, skewer the grilled chicken, and assemble all containers.
By following this flow, you have produced 10-15 high-protein meals in roughly two hours of active work, covering your dinners and lunches for the majority of the work week.
Customizing for Different Dietary Needs
The beauty of the Tikka profile is its adaptability.
- Keto/Low Carb: Stick to Recipe 1 and Recipe 2. Increase the fat content by using full-fat Greek yogurt or adding a side of avocado.
- Dairy-Free: Replace the Greek yogurt with a thick coconut yogurt (unsweetened) or a cashew-based cream. The enzymes in coconut yogurt also contain acids that help tenderize the meat.
- Extra Bulk (Weight Gain): Serve any of these recipes with a side of garlic naan or saffron basmati rice. The spices in the Tikka chicken complement high-quality basmati perfectly.
Conclusion: The Tikka Revolution
The journey to a healthier body does not have to be paved with flavorless meals. By mastering the art of the Tikka marinade, you are equipping yourself with a culinary tool that ensures your protein intake is never a chore.
These five recipes—ranging from the charred perfection of the grilled skewers to the comforting depth of the Tikka pasta—provide enough variety to keep your meal prep exciting for months. Remember, the key to consistency is enjoyment. When you look forward to your high-protein Tikka dinner every night, hitting your fitness goals becomes an inevitable byproduct of your delicious lifestyle.
Get your containers ready, fire up the grill, and let the aromatic spices of Tikka transform your meal prep routine today.
