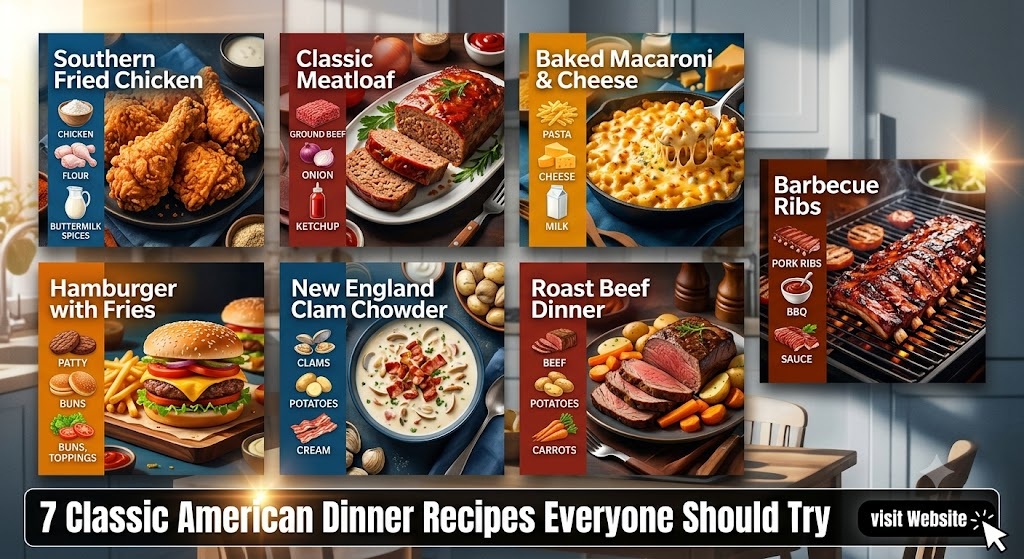
American cuisine is often described as a “melting pot,” a vibrant tapestry woven from the culinary traditions of immigrants, the ingenuity of rural homesteaders, and the bold flavors of the frontier. It is a cuisine defined by its diversity—from the slow-smoked pits of the South to the creamy seafood stews of the Atlantic coast. But beyond the diversity, there are certain “pillars” of the American dinner table that have stood the test of time. These are the dishes that evoke nostalgia, provide comfort, and define the cultural identity of a nation.
In this comprehensive guide, we delve into seven iconic American dinner recipes. These aren’t just meals; they are institutions. We will explore the history, the science of the ingredients, and the meticulous step-by-step processes required to master these classics in your own kitchen.
1. The Ultimate American Cheeseburger
The cheeseburger is perhaps the most recognizable symbol of American food culture. While its origins are debated, its status as the king of the backyard grill is undisputed. A truly great cheeseburger isn’t about fancy toppings; it’s about the synergy between a high-quality beef patty, a soft bun, and the perfect melt of cheese.
The Ingredients
For the Patties:
- Beef: 2 lbs of Ground Chuck (80% lean, 20% fat). The fat content is crucial for juiciness and flavor.
- Salt: Coarse Kosher salt.
- Pepper: Freshly cracked black pepper.
- Butter: 2 tablespoons of unsalted butter (for the buns).
For the Assembly:
- Cheese: 4 thick slices of sharp American cheese or Mild Cheddar. American cheese is prized here for its superior melting point.
- Buns: 4 Brioche or Potato rolls. These are soft enough to compress but sturdy enough to hold the juices.
- Lettuce: Crisp Iceberg or Green Leaf lettuce.
- Tomato: Thick slices of vine-ripened beefsteak tomato.
- Onion: Thinly sliced red onion or caramelized yellow onions.
- Condiments: Yellow mustard, ketchup, and high-quality mayonnaise.
- Pickles: Sliced dill pickle chips.
How to Cook: The Master Detail
- Prep the Meat: The secret to a tender burger is minimal handling. Cold beef is easier to work with. Divide your 2 lbs of beef into four equal portions (8 oz each). Gently shape them into discs about 1 inch thick and slightly wider than your bun, as they will shrink during cooking.
- The Dimple: Use your thumb to create a shallow indentation in the center of each patty. This prevents the burger from “puffing up” into a football shape on the grill.
- Seasoning: Do not season the meat until right before it hits the heat. If you mix salt into the beef, it breaks down the proteins and creates a rubbery, sausage-like texture. Season generously with salt and pepper on both sides just before cooking.
- The Heat: Use a cast-iron skillet or a heavy-duty grill. Get it screaming hot. You want to see wisps of smoke.
- The Sear: Place the patties down. If using a skillet, you can press down slightly once (and only once!) to ensure contact. Sear for 3–4 minutes until a deep, dark brown crust (the Maillard reaction) forms.
- The Flip: Flip the burgers. Immediately place the cheese slices on the cooked side.
- The Steam: If using a skillet, add a teaspoon of water to the pan and cover it with a lid for 30 seconds. This creates a steam pocket that melts the cheese perfectly without overcooking the meat.
- Toasting the Buns: While the meat rests, spread butter on the cut sides of your buns and toast them on the grill or in a separate pan until golden brown. This creates a moisture barrier so the bun doesn’t get soggy.
- Assembly: Layer in this order: Bottom bun, mayo, pickles, patty with cheese, tomato, onion, lettuce, mustard/ketchup, and top bun. This “structural engineering” ensures the lettuce stays crisp and the bottom bun stays dry.
2. Southern Buttermilk Fried Chicken
Southern Fried Chicken is an art form. It’s a dish that demands patience, a specific technique for the “crunch,” and a deep understanding of temperature. The hallmark of great fried chicken is a shattering, craggy crust and meat that is seasoned all the way to the bone.
The Ingredients
The Chicken & Brine:
- 1 whole chicken (approx. 3-4 lbs), broken down into 8 pieces (2 breasts, 2 thighs, 2 wings, 2 drumsticks).
- 1 quart Buttermilk.
- 2 tablespoons Kosher salt.
- 1 tablespoon Hot sauce (e.g., Tabasco or Crystal).
- 1 teaspoon Garlic powder.
The Seasoned Flour:
- 3 cups All-purpose flour.
- 1/2 cup Cornstarch (the secret to extra crunch).
- 1 tablespoon Smoked Paprika.
- 1 tablespoon Onion powder.
- 1 tablespoon Garlic powder.
- 1 teaspoon Cayenne pepper (adjust for heat).
- 2 teaspoons Black pepper.
- 1 tablespoon Salt.
For Frying:
- 1 quart Peanut oil or Vegetable oil (Peanut oil has a higher smoke point and cleaner flavor).
How to Cook: The Master Detail
- The Brine (The Most Important Step): In a large bowl, whisk together the buttermilk, salt, hot sauce, and garlic powder. Submerge the chicken pieces in this mixture. Cover and refrigerate for at least 4 hours, preferably overnight. The acid in the buttermilk tenderizes the meat, while the salt penetrates deep for flavor.
- The Dredge: In a large shallow dish, whisk together the flour, cornstarch, and all the spices.
- The “Craggy” Secret: Take 3 tablespoons of the buttermilk brine and whisk it into the dry flour mixture. Use your fingers to rub it in until small clumps form. These clumps will stick to the chicken and create those coveted extra-crunchy bits.
- Coating the Chicken: Remove a piece of chicken from the brine, letting the excess drip off. Dredge it thoroughly in the flour, pressing the flour onto the meat to ensure every nook and cranny is covered. Place the coated chicken on a wire rack and let it sit for 15 minutes. This “sets” the breading so it doesn’t fall off in the oil.
- Heating the Oil: In a heavy Dutch oven or cast-iron skillet, heat 2 inches of oil to 350°F (175°C). Use a thermometer; temperature control is vital.
- The Fry: Carefully lower the chicken into the oil. Do not overcrowd the pan, or the oil temperature will drop and the chicken will become greasy. Fry in batches.
- Dark meat (thighs/legs): 12–15 minutes.
- White meat (breasts/wings): 8–10 minutes.
- The Finish: The internal temperature should reach 165°F (74°C). The crust should be deep golden brown.
- Resting: Drain the chicken on a wire rack (not paper towels, which cause steaming and sogginess) for at least 10 minutes before serving.
3. Texas-Style Slow-Smoked Beef Brisket
Barbecue is the soul of American cooking, and in Texas, the brisket is king. This recipe is less about “cooking” and more about “managing an environment.” It requires a smoker and a significant amount of time (often 12–16 hours), but the result is a melt-in-your-mouth delicacy that defines Central Texas excellence.
The Ingredients
- The Meat: 1 whole “Packer” Brisket (12–15 lbs), consisting of the “flat” and the “point.”
- The Rub (Dalmatian Rub): 1/2 cup Coarse Black Pepper (16-mesh is preferred) and 1/2 cup Kosher Salt. Texans keep it simple to let the beef shine.
- The Binder: A thin coating of yellow mustard (it won’t taste like mustard; it just helps the rub stick).
- The Wood: Post Oak is traditional, but Hickory or Pecan also works well.
How to Cook: The Master Detail
- Trimming: This is a crucial skill. Cold brisket is easier to trim. Remove the “hard fat” (the deckle) and trim the fat cap on the bottom to about 1/4 inch thickness. Aerodynamics matter; trim the edges to be smooth so smoke flows over the meat without creating burnt “ears.”
- Seasoning: Apply a light coat of mustard. Mix your salt and pepper. Shake the rub over the brisket from about 12 inches above to ensure an even coating. Cover all sides, including the edges.
- The Smoker: Preheat your smoker to a steady 225°F–250°F (107°C–121°C).
- The Smoke: Place the brisket in the smoker, fat-side up or fat-side down depending on your smoker type (fat-side toward the heat source). Insert a probe thermometer into the thickest part of the flat.
- The “Stall”: Around 160°F–170°F internal temperature, the brisket will stop rising in temperature for several hours. This is the “stall,” caused by evaporative cooling.
- The Texas Crutch: Once the “bark” (the dark outer crust) is set and looks like obsidian, wrap the brisket tightly in peach butcher paper (traditional) or aluminum foil. This speeds up the cooking and keeps the meat moist.
- The Finish: Continue cooking until the internal temperature reaches approximately 203°F (95°C). The most important test is the “probe test”—the thermometer should slide into the meat like it’s going into room-temperature butter.
- The Rest (Crucial): Do not skip this. Wrap the brisket in a towel and place it in an empty cooler (no ice!) for at least 2 to 4 hours. This allows the juices to redistribute and the connective tissue to fully finish breaking down.
- Slicing: Slice against the grain. The flat and the point have grains running in different directions, so you will need to rotate the meat halfway through.
4. Homestyle Meatloaf with Garlic Mashed Potatoes
Meatloaf is the ultimate American “blue-plate special.” It’s a dish that rose to prominence during the Great Depression as a way to stretch expensive meat using fillers, but it has since evolved into a gourmet comfort food staple.
The Ingredients
For the Meatloaf:
- 1.5 lbs Ground Beef (85/15).
- 0.5 lb Ground Pork (adds moisture and fat).
- 1 cup Panko breadcrumbs.
- 1/2 cup Whole milk (to soak the breadcrumbs).
- 2 large Eggs, beaten.
- 1 medium Yellow onion, finely minced and sautéed.
- 3 cloves Garlic, minced.
- 2 tablespoons Worcestershire sauce.
- 1/4 cup Fresh parsley, chopped.
- 1 teaspoon Dried thyme.
- Salt and Black pepper.
The Tangy Glaze:
- 1/2 cup Ketchup.
- 2 tablespoons Brown sugar.
- 1 tablespoon Apple cider vinegar.
- 1 teaspoon Garlic powder.
For the Garlic Mashed Potatoes:
- 3 lbs Yukon Gold potatoes, peeled and cubed.
- 1/2 cup Unsalted butter.
- 1 cup Heavy cream or Half-and-half.
- 4 cloves Garlic, smashed and simmered in the cream.
- Salt to taste.
How to Cook: The Master Detail
- The Panade: In a small bowl, soak the breadcrumbs in the milk for 5–10 minutes. This “panade” is the secret to a moist meatloaf; it prevents the meat proteins from knitting together too tightly.
- Sautéing: Never put raw onions in meatloaf. Sauté the onions and garlic in a little butter until translucent and let them cool.
- Mixing: In a large bowl, combine the beef, pork, panade, eggs, sautéed aromatics, Worcestershire, and herbs. Use your hands to mix gently. Over-mixing leads to a dense, tough loaf.
- Shaping: You can use a loaf pan, but for the best results, shape the meat into a loaf on a parchment-lined baking sheet. This allows the edges to caramelize.
- Baking: Bake at 350°F (175°C) for 45 minutes.
- Glazing: Whisk the glaze ingredients together. After 45 minutes, remove the meatloaf and brush the glaze generously over the top and sides. Return to the oven for another 15 minutes or until the internal temp is 160°F.
- The Potatoes: While the meatloaf cooks, boil the potatoes in salted water until fork-tender.
- The Infusion: While boiling, heat your cream and butter with the smashed garlic cloves. Strain the garlic out before adding the liquid to the potatoes.
- Mashing: Use a potato ricer for the smoothest texture. Fold in the warm cream/butter mixture slowly until the desired consistency is reached.
5. New England Clam Chowder
There are many regional variations of chowder in America, but the white, creamy New England version is the most iconic. It is a thick, hearty soup designed to warm the bones of sailors and coastal residents during harsh winters.
The Ingredients
- The Clams: 2 dozen fresh Littleneck clams (scrubbed) PLUS 2 cans (6.5 oz) of chopped clams in juice.
- The Pork: 4 oz Salt pork or thick-cut Bacon, diced.
- Aromatics: 1 large Onion (finely diced), 2 stalks Celery (diced).
- The Liquid: 1 cup Bottled clam juice (if needed to supplement), 2 cups Heavy cream.
- Potatoes: 1.5 lbs Russet potatoes, peeled and cut into 1/2 inch cubes.
- Thickener: 3 tablespoons All-purpose flour.
- Seasoning: 2 Dried bay leaves, 1/2 teaspoon Dried thyme, Fresh black pepper, and a pinch of Nutmeg.
- Garnish: Fresh chives and Oyster crackers.
How to Cook: The Master Detail
- Steaming Fresh Clams: In a large pot, add 1/2 cup water and the fresh clams. Cover and steam for 5–8 minutes until they open. Strain the liquid through a fine-mesh sieve (this is “liquid gold”). Chop the clam meat and set aside.
- Rendering: In the same pot, cook the bacon or salt pork over medium heat until the fat is rendered and the bits are crispy. Remove the crispy bits and save for garnish.
- Sautéing: Add the onion and celery to the fat. Cook until soft but not browned.
- The Roux: Stir in the flour and cook for 2 minutes to remove the raw flour taste. This creates the base of your thickener.
- Building the Soup: Gradually whisk in the reserved clam liquor and any bottled clam juice. Add the potatoes, bay leaves, and thyme.
- Simmering: Bring to a gentle simmer. Do not boil vigorously. Cook until potatoes are tender (about 15 minutes).
- Finishing: Stir in the chopped clams (fresh and canned) and the heavy cream. Let it heat through for 5 minutes.
- The Secret Touch: Add a tiny pinch of nutmeg. It doesn’t make the soup taste like spice; it just enhances the richness of the cream.
- Resting: Chowder is always better if it sits for 20 minutes before serving, allowing the flavors to meld. Serve with plenty of oyster crackers.
6. Classic Baked Three-Cheese Macaroni and Cheese
Macaroni and cheese is the quintessential American side dish that often steals the show as a main. While the “blue box” is a childhood staple, the authentic version uses a Mornay sauce (a Béchamel with cheese) and a blend of high-quality cheeses to create a silky, decadent masterpiece.
The Ingredients
- The Pasta: 1 lb Elbow Macaroni or Cavatappi (corkscrew shape holds sauce better).
- The Cheese Trio:
- 8 oz Extra Sharp White Cheddar (for bite).
- 4 oz Gruyère (for nuttiness and meltability).
- 4 oz Fontina or Mozzarella (for the “cheese pull”).
- The Sauce Base:
- 4 tablespoons Unsalted butter.
- 1/4 cup All-purpose flour.
- 4 cups Whole milk (room temperature).
- Seasoning: 1 teaspoon Dry mustard (essential for cutting through the fat), 1/2 teaspoon Onion powder, 1/4 teaspoon Cayenne pepper, Salt, and Black pepper.
- The Topping: 1 cup Panko breadcrumbs mixed with 2 tablespoons melted butter and 1/4 cup grated Parmesan.
How to Cook: The Master Detail
- Boiling the Pasta: Cook the pasta in heavily salted water. CRITICAL: Cook it for 2 minutes less than the package directions for al dente. It will finish cooking in the oven. Drain and rinse with cold water to stop the cooking.
- The Roux: In a large saucepan, melt the butter. Whisk in the flour and cook for 2 minutes until it smells slightly nutty but stays pale.
- The Béchamel: Slowly whisk in the milk, one cup at a time. Ensure there are no lumps. Simmer gently until the sauce is thick enough to coat the back of a spoon.
- The Mornay: Turn the heat to low. Stir in the dry mustard, onion powder, and cayenne. Add the shredded cheeses (reserve a handful for the top) and stir until completely melted and smooth.
- Combining: Fold the cooked pasta into the cheese sauce. It will look like there is too much sauce—this is exactly what you want. The pasta will absorb the excess moisture in the oven.
- Baking: Pour the mixture into a buttered 9×13 baking dish. Sprinkle the remaining cheese and the buttery Panko/Parmesan mixture over the top.
- The Crust: Bake at 375°F (190°C) for 25–30 minutes until the sauce is bubbling and the top is a deep golden brown.
- Resting: Let it stand for 10 minutes. This allows the sauce to set so it’s not runny when served.
7. Kansas City Style BBQ Pork Ribs
Unlike Texas brisket, which is savory and peppery, Kansas City ribs are famous for their thick, sweet, and tangy tomato-based glaze. These ribs are “fall-off-the-bone” tender and represent the pinnacle of American backyard entertaining.
The Ingredients
- The Meat: 2 slabs of St. Louis-cut Pork Spare Ribs or Baby Back Ribs.
- The Dry Rub: 1/2 cup Brown sugar, 2 tablespoons Paprika, 1 tablespoon Black pepper, 1 tablespoon Salt, 1 tablespoon Garlic powder, 1 tablespoon Onion powder, 1 teaspoon Cayenne pepper.
- The Mop/Spritz: Apple juice in a spray bottle.
- The Sauce: 2 cups Ketchup, 1/2 cup Apple cider vinegar, 1/4 cup Molasses, 1/4 cup Honey, 2 tablespoons Worcestershire sauce, 1 tablespoon Liquid smoke (if not using a real smoker).
How to Cook: The Master Detail
- Removing the Membrane: On the back of the ribs, there is a silver-skin membrane. It is tough and prevents smoke from reaching the meat. Use a paper towel to grip the edge and peel it off in one motion.
- The Rub: Apply the dry rub generously to both sides of the ribs. Pat it in firmly. Let the ribs sit for at least an hour at room temperature or overnight in the fridge.
- The Smoker/Oven: Preheat your smoker or oven to 225°F (107°C).
- The 3-2-1 Method: This is the foolproof method for perfect ribs.
- 3 Hours: Place the ribs on the rack (bone-side down). Smoke for 3 hours, spritzing with apple juice every 45 minutes to keep them moist.
- 2 Hours: Remove the ribs. Lay out a large piece of heavy-duty foil. Place the ribs on the foil. Add a few pads of butter, an extra sprinkle of brown sugar, and a splash of apple juice. Wrap them tightly and return to the heat. This “braises” the ribs to make them tender.
- 1 Hour: Carefully unwrap the ribs (save the juices!). Place them back on the rack. Brush them with the Kansas City BBQ sauce. Let them cook for another 45–60 minutes. The sauce will “tack up” and become a sticky, glossy glaze.
- The Bend Test: Pick the ribs up with tongs from one end. If they bend and the meat starts to crack slightly in the middle, they are done.
- Slicing: Let them rest for 15 minutes. Flip them bone-side up to see the bones clearly, making it easier to slice perfectly between them.
Conclusion: The Spirit of the American Kitchen
These seven recipes represent more than just food; they represent a commitment to process and a celebration of flavor. Whether it’s the patience required for a 12-hour smoked brisket, the precision of a cheese sauce for macaroni, or the textural balance of a perfect cheeseburger, these dishes require a cook to be present and engaged.
When you cook these classics, you aren’t just making dinner; you are participating in a culinary tradition that has been refined in diners, competition pits, and family kitchens for over a century. So, fire up your grill, preheat your oven, and prepare to experience the very best of American home cooking. These are the flavors that bring people together, one plate at a time.
