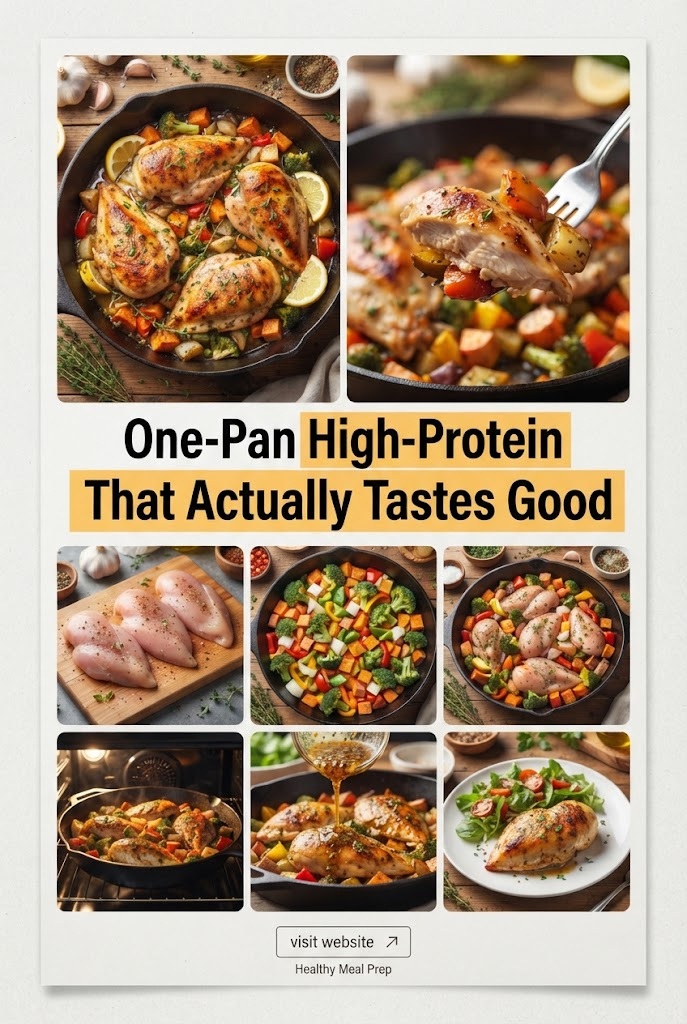
One-Pan High-Protein Chicken That Actually Tastes Good: The Ultimate Guide to Macro-Friendly, Flavor-Packed Feasts
Let us address the elephant in the room: healthy, high-protein cooking has a massive branding problem. For decades, the fitness community has pushed a narrative that eating for muscle growth, fat loss, or general health requires suffering through dry chicken breast, unseasoned steamed broccoli, and plain brown rice. It is treated as a clinical chore rather than a culinary experience.
We have all been there. You cook up a batch of chicken breasts with high hopes, take one bite, and realize you need an entire glass of water just to wash down a single dry morsel. It tastes like cardboard, smells faintly of rubber, and leaves you wondering why you bothered in the first place.
It does not have to be this way.
High-protein eating can—and should—be an absolute culinary delight. You do not need to sacrifice flavor to hit your macros, and you certainly do not need to spend hours washing a mountain of pots, pans, and mixing bowls afterward.
Welcome to the ultimate guide to One-Pan High-Protein Chicken. In this comprehensive deep-dive, we are going to completely redefine how you view meal prep and weeknight cooking. We will break down the science of why chicken goes wrong, the foundational techniques for keeping meat exceptionally juicy, a master recipe that will change your relationship with healthy food, and a complete breakdown of macros, variations, and storage strategies.
Part 1: Why Healthy Chicken Usually Sucks (And How to Fix It)
Before we fire up the stove, we need to understand the enemy. Why is standard chicken breast so universally reviled as dry and flavorless? The answer lies in biology, physics, and a few common kitchen mistakes.
1. The Anatomy of Overcooking
Chicken breast is a lean, white-meat muscle containing very little intramuscular fat (marbling). Fat is what gives beef ribeyes and chicken thighs their built-in insurance policy against overcooking; as fat renders, it keeps the meat lubricated.
Chicken breast has almost none of this. Instead, it is made up of long muscle fibers packed with water and protein. When you apply heat, these protein filaments tighten and squeeze out moisture. The moment the internal temperature crosses the safe threshold of 74°C (165°F) and continues climbing, those fibers lock together like a clenched fist, wringing out every last drop of moisture. Within minutes, succulent meat turns into sawdust.
2. The Power of the Brine
How do restaurants serve chicken breasts that are impossibly juicy? The secret weapon is a simple brine.
Submerging chicken in a solution of water and salt (or applying dry salt ahead of time) triggers a process called protein denaturation. The salt dissolves some of the muscle proteins, allowing the meat to absorb and retain water during cooking. Even as the heat causes the proteins to tighten up, that extra moisture remains trapped inside. A simple 30-minute salt brine or marinade is the ultimate game-changer for lean poultry.
3. Surface Area and the Maillard Reaction
Flavor does not live inside the center of a chicken breast; it lives on the crust. The Maillard reaction—the chemical reaction between amino acids and reducing sugars that gives browned food its irresistible, savory depth—requires two things: high heat and dry surface area.
If you crowd a pan with wet chicken, the meat will steam instead of sear. It turns an unappealing, pale gray and lacks depth. By using a single large skillet, controlling the temperature, and giving each piece of chicken room to breathe, we can build a deeply caramelized, golden crust that seals in flavor and elevates the dish.
Part 2: The Philosophy of One-Pan Cooking
Why limit yourself to a single skillet? The benefits extend far beyond saving yourself from a mountain of dishwashing.
- Flavor Synergy: When your chicken, aromatics, vegetables, and sauce cook together in the same vessel, a magical thing happens. The rendered juices from the protein enrich the sauce, the vegetables absorb the savory drippings, and the sauce reduces down to coat every single ingredient in concentrated flavor.
- Nutrient Retention: Boiling or over-rinsing vegetables leaches vital water-soluble vitamins. One-pan roasting, pan-searing, and simmering lock those nutrients into the pan juices, which you consume right along with the meal.
- Efficiency: Time is our most precious commodity. Juggling multiple pans requires constant attention, timing gymnastics, and frantic multitasking. A one-pan meal streamlines the process, allowing you to prep, cook, and clean up with maximum ease.
Part 3: The Master Recipe – Tuscan Garlic Butter & Spinach One-Pan Chicken
This recipe is designed to shatter every misconception you have about healthy cooking. It features a rich, creamy, garlic-herb profile reminiscent of upscale Italian dining, yet it is completely macro-friendly, loaded with micronutrients, and built entirely in a single skillet.
Equipment Needed
- Large heavy-bottomed skillet or cast-iron pan (at least 12 inches)
- Tongs
- Meat thermometer
- Measuring cups and spoons
Ingredients Form
For the Chicken & Marinade:
- Boneless, skinless chicken breasts: 4 large pieces (approx. 650g to 700g total), trimmed of excess fat
- Extra virgin olive oil: 1 tablespoon
- Minced garlic: 2 cloves
- Dried oregano: 1 teaspoon
- Smoked paprika: 1 teaspoon
- Salt: 1 teaspoon
- Black pepper: 1/2 teaspoon
For the Skillet Foundation & Sauce:
- Unsalted butter: 1 tablespoon (for searing)
- Yellow onion: 1 medium, finely diced
- Garlic cloves: 4 large, minced
- Low-sodium chicken broth: 1 cup
- Light cream cheese or heavy cream: 1/3 cup (light cream cheese keeps macros lean while providing incredible velvety texture)
- Grated Parmesan cheese: 1/4 cup
- Sun-dried tomatoes: 1/3 cup, drained and sliced into thin strips
- Fresh baby spinach: 4 packed cups
- Fresh basil leaves: 10 leaves, roughly chopped (for garnish)
- Lemon juice: 1 tablespoon (freshly squeezed, to brighten the sauce)
Step-by-Step Cooking Instructions
Step 1: Prep and Tenderize
- Place your chicken breasts on a cutting board. If they vary wildly in thickness (which most do), use a meat mallet or the bottom of a heavy skillet to gently pound the thicker ends until the entire breast has an even thickness. This ensures uniform cooking time so the thin ends do not dry out before the thick centers reach safety.
- In a medium bowl, combine the olive oil, 2 minced cloves of garlic, oregano, smoked paprika, salt, and black pepper.
- Add the chicken breasts to the bowl, rubbing the marinade thoroughly into every surface. Let the chicken rest at room temperature for 15 to 20 minutes. (If you have more time, let them marinate in the refrigerator for up to 4 hours).
Step 2: The Perfect Sear
- Place your large skillet over medium-high heat and allow it to heat up completely for 2 minutes.
- Add 1 tablespoon of butter and swirl it across the pan.
- Lay the marinated chicken breasts into the skillet. You should hear an immediate, aggressive sizzle. If you do not, the pan is not hot enough.
- Leave the chicken completely undisturbed for 5 to 6 minutes. Do not poke, prod, or move them. This allows a deep, golden-brown crust to develop via the Maillard reaction.
- Flip the chicken breasts. Cook for an additional 4 to 5 minutes on the second side, or until a meat thermometer inserted into the thickest part reads 70°C (158°F). Remember, residual carryover cooking will bring the internal temperature up to the safe 74°C (165°F) mark while they rest.
- Transfer the cooked chicken to a clean plate and tent loosely with aluminum foil. Do not skip this resting period; it allows the muscle fibers to relax and reabsorb their juices.
Step 3: Build the Aromatic Base
- Reduce the heat under the same skillet to medium. Do not wipe out the pan—those leftover brown bits (fond) stuck to the bottom are pure gold for flavor.
- Add the diced yellow onions to the residual pan juices. Sauté for 3 to 4 minutes, stirring frequently with a wooden spoon, until the onions are soft and translucent.
- Toss in the 4 minced cloves of garlic and the sun-dried tomato strips. Sauté for exactly 60 seconds until the garlic becomes deeply fragrant. Be careful not to let the garlic burn, as bitter garlic will ruin the sauce.
Step 4: Create the Creamy Velvety Sauce
- Pour in the low-sodium chicken broth, using your wooden spoon to scrape up all the delicious browned bits from the bottom of the pan. Bring the liquid to a gentle simmer.
- Whisk in the light cream cheese (or heavy cream) and the grated Parmesan cheese. Stir continuously until the cheeses melt completely into the broth, forming a smooth, glossy sauce.
- Allow the sauce to simmer uncovered for 3 to 4 minutes until it reduces slightly and thickens to coat the back of a spoon.
Step 5: Incorporate Greens and Reintroduce Chicken
- Add the 4 packed cups of fresh baby spinach directly into the skillet. Stir gently into the warm sauce. Within 60 to 90 seconds, the spinach will wilt down into a vibrant green ribbon texture.
- Stir in the fresh lemon juice to cut through the richness of the cheese and balance the flavor profile. Taste the sauce and add a pinch of salt and pepper if needed.
- Return the rested chicken breasts (along with any juices that accumulated on the resting plate) back into the skillet, spooning the creamy garlic, tomato, and spinach sauce generously over the top.
Step 6: Serve and Garnish
- Garnish the dish with freshly chopped basil leaves and an extra crack of black pepper.
- Serve immediately while piping hot.
Part 4: Nutritional Profile & Macro Breakdown
One of the greatest hurdles in fitness nutrition is calculating exact macros. Here is the precise nutritional breakdown for the entire recipe, as well as per serving (assuming the recipe yields 4 generous servings).
Per Serving Breakdown (1/4 of total recipe):
- Calories: 385 kcal
- Protein: 48.5g
- Carbohydrates: 9.2g
- Dietary Fiber: 2.1g
- Net Carbs: 7.1g
- Fat: 17.5g
- Saturated Fat: 6.2g
- Sodium: 580mg
Why These Macros Work:
- Massive Protein Punch: At nearly 49 grams of protein per serving, this meal supports muscle protein synthesis, recovery after heavy resistance training, and long-lasting satiety.
- Controlled Carbs: With only about 7 grams of net carbs per serving, this dish fits seamlessly into ketogenic, low-carb, or cyclical macro plans.
- Healthy Fats: Balanced fats from olive oil, butter, and cheese provide essential fatty acids and hormone support without derailing your daily caloric budget.
Part 5: Endless Variations to Keep Your Tastebuds Excited
Eating the exact same meal every single day is a fast track to diet fatigue. Once you master the core technique of this one-pan method, you can easily pivot flavor profiles using pantry staples. Here are three high-protein variations to rotate through your weekly meal plan:
1. Zesty Lemon Herb & Asparagus Skillet
- The Flavor Profile: Bright, herbaceous, and crisp.
- The Swap: Skip the cream cheese and Parmesan. Instead, build your pan sauce using chicken broth, fresh lemon juice, 2 tablespoons of capers, 1 tablespoon of Dijon mustard, and a splash of white wine vinegar.
- The Veggie: Toss in fresh trimmed asparagus spears right into the broth alongside the chicken as it finishes cooking.
- Macros Impact: Lower calorie, lower fat, and exceptionally refreshing for summer months.
2. Spicy Southwest Fajita Skillet
- The Flavor Profile: Smokey, bold, and fiery.
- The Swap: Season your chicken with chili powder, cumin, garlic powder, and onion powder. For the pan base, sauté sliced bell peppers, red onions, and jalapeños. Deglaze with crushed fire-roasted tomatoes and a splash of lime juice. Top with fresh cilantro and a dollop of Greek yogurt (as a high-protein sour cream substitute).
- The Macros Impact: High volume of fiber from bell peppers with very low calorie density.
3. Creamy Mushroom Stroganoff Chicken
- The Flavor Profile: Earthy, savory, and comforting.
- The Swap: Sauté sliced cremini and baby portobello mushrooms in the pan before adding your chicken broth and light cream cheese. Add a dash of Worcestershire sauce and fresh thyme.
- The Macros Impact: Incredibly rich umami flavor profile that satisfies deep comfort-food cravings without heavy carbs.
Part 6: Pro Tips for Meal Prep and Storage
Can you make this dish ahead of time? Absolutely. In fact, lean chicken breasts often taste even better the next day as the flavors continue to meld in the refrigerator. Follow these golden rules for storage and reheating:
- Storage Containers: Store portions in airtight glass meal-prep containers. Glass prevents staining from the sun-dried tomatoes and does not leach chemicals when reheated.
- Refrigerator Lifespan: This dish will keep safely in the refrigerator for 3 to 4 days.
- The Reheating Trap: Blasting chicken breast in the microwave on high power for 3 minutes is the #1 way to turn leftover chicken into rubber. Instead, cover your container loosely with a damp paper towel and microwave on 50% power (medium heat) for 2 to 3 minutes, stirring the sauce halfway through. This gentle heating method warms the meat evenly without tightening the muscle fibers past their breaking point.
- Freezing Note: Cream-based sauces can sometimes separate or grain up when frozen and thawed. If you plan to freeze portions for future weeks, stick to the broth-based or tomato-based variations rather than the cheesy cream sauce.
Final Thoughts: Eat Well, Reach Your Goals
Fitness is not a temporary punishment; it is a sustainable lifestyle. When you learn how to combine rigorous nutritional targets with exceptional culinary execution, healthy eating stops feeling like a sacrifice.
You no longer need to choke down dry, uninspired meals in the name of gains. With just one pan, a handful of quality ingredients, and proper temperature control, you can create restaurant-quality feasts that fuel your body, satisfy your palate, and keep your kitchen clean.
Fire up that skillet, treat your chicken with respect, and discover just how delicious high-protein eating can truly be.
